Previously, Teams Rooms users needed to use Direct Guest Join or manually dial the SIP address to enter any meeting other than Teams.
Now, in close collaboration with Microsoft on enabling cross-platform meetings via SIP join for Teams Rooms, we’ve released Pexip Connect for Teams Rooms - an easy-to-use and high-quality alternative to Direct Guest Join that features:
- Enhanced meeting interoperability between Teams Rooms devices and Cisco Webex, Zoom, Google Meet, or any SIP-enabled meetings.
- Native integration with the Teams Rooms device calendar and ‘one touch join’ capabilities.
- In-room content sharing using the local HDMI cable connected to a Teams Room device. Just plug in and hit “Share”. There’s no need to join from a separate client to share content.
- Full dual-screen support automatically shows participants and content on both screens.
Demo: See Pexip Connect for Teams rooms in action
Tip: This service is for Teams Rooms on Windows devices (running version 5.2 and later) with Pro licensing. Support for Android devices is planned for 2025 . See the section on enhanced cross-platform meetings via SIP join.
How to set up Pexip Connect for Teams Rooms
Once you have gotten in touch with us or our resellers to purchase and activate Pexip Connect for Teams Rooms, which you can easily do by visiting the Pexip Connect for Team Rooms page and filling out the form, then follow the next steps, listed below:
1. Specify and verify M365 Domain
- You must add a DNS TXT record for your Microsoft 365 domain (the domain associated with your Microsoft Tenant) so that your domain can be verified by the Pexip Service.
- Refer to the New Microsoft 365 domain email you received from Pexip. This contains the specific details about the DNS entries that you need to set up for your calling domain. Note that the instructions to add the DNS TXT record are omitted if you have already verified the same domain (or the root domain) as a calling domain.

- For further detail see the help article: Setting up a DNS TXT record
2. Initiate admin consent for the Pexip Service to connect to your tenant
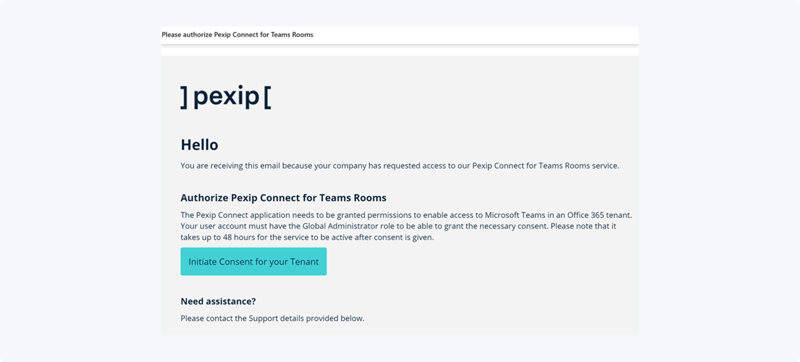
- The consent email should be sent to one of your Office 365 administrators.

For customers with existing Pexip CVI service: when you click the link in the email it will immediately inform you that administrator consent was successfully granted because Teams Room calling uses the same app (and permissions) as your existing CVI service

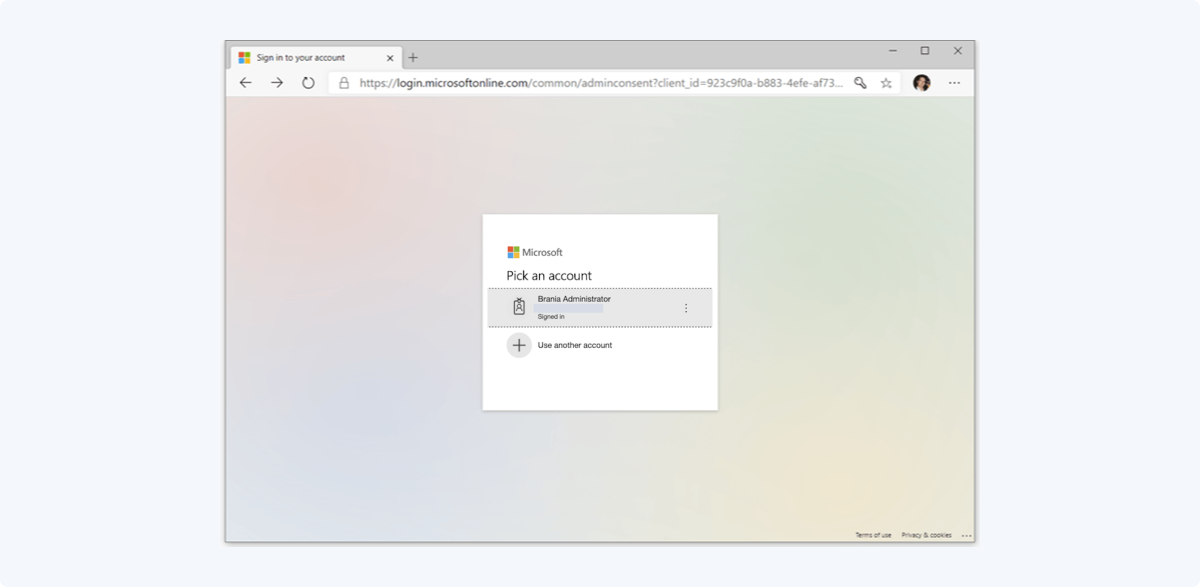
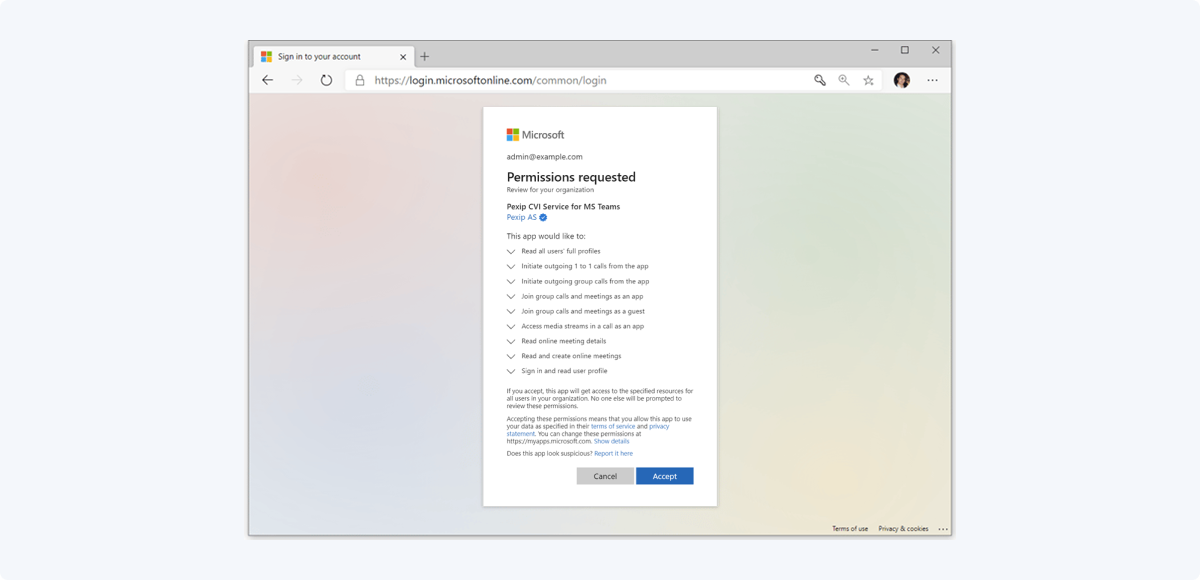
- Follow the instructions to log in with your O365 account and then click Accept when prompted.

- Accept the request.

For more information about permissions
- A confirmation page verifies that the consent was successfully provided. The page also instructs you to run some PowerShell commands to complete the setup. These commands to enable and configure your calling policy must be performed by a Teams tenant administrator with "Global Admin" access.
3. Enable your Teams Rooms SIP & H.323 Video Teleconferencing Policy via PowerShell
Your IT administrator must run some Teams PowerShell cmdlets to enable the Teams Room calling policy and give permissions to their VTCs that are to be used for 1:1 calling. (Note for further information see the Microsoft help article How to configure Video Teleconferencing Policy).
1. Start a PowerShell session as Administrator.
2.Run the following commands to sign in to your Teams tenant:
- In all standard deployments run:
Import-Module MicrosoftTeam
Connect-MicrosoftTeams - If this is a GCC High / Azure US Government Cloud deployment then use these commands instead:
Import-Module MicrosoftTeams
Connect-MicrosoftTeams -TeamsEnvironmentName TeamsGCCH
You can then use the following commands to configure your calling policies.
- To get a list of your existing policies, run the following command:
Get-CsTeamsRoomVideoTeleConferencingPolicy - To create a new policy:
New-CsTeamsRoomVideoTeleConferencingPolicy -Identity "MtrSipCallingPolicy" -Enabled $true -AreaCode "923c9f0a-b883-4efe-af73-54810da59f83" -ReceiveExternalCalls "Enabled" -ReceiveInternalCalls "Enabled"
- The -AreaCode given above is the Pexip Service AppID; this should be used in your own command.
- "MtrSipCallingPolicy" is the name of the policy being created. You can use any name of your choosing.
Note that ReceiveExternalCalls and ReceiveInternalCalls default to Disabled when not provided. These properties take only two values: Enabled or Disabled. This lets you configure which types of calls (marked as internal and/or externally originating) you can receive.
- To grant a particular policy configuration ("MtrSipCallingPolicy" in this example) to all users/rooms:
Grant-CsTeamsRoomVideoTeleConferencingPolicy -PolicyName "MtrSipCallingPolicy" -Global
See full help article for: Other useful commands
4. Test with 3rd party SIP enabled meeting
You're ready!
- Forward a cross-platform meeting invite (i.e. a SIP enabled Zoom, Webex, or other 3rd party meeting invite with SIP dial in details) to the Teams Room
- The Teams Room calendar will update with the join button
- Press the ‘Join’ button to connect

To manually place a call from the Teams Room:
- Select Call on the room console.
- Select SIP or H.323 as appropriate.
- Enter the address of the VTC you want to call.
- Select Call.

Note that the Teams Room software is regularly updated, thus some images shown here may not directly match the current appearance and options.
Receiving a call

Tip:
- For customers with self-hosted deployments, check out this article for help setting up the Teams Rooms calling capability: Configuring Pexip Infinity as a Microsoft Teams gateway | Pexip Infinity Docs
- Many of our customers also leverage the Pexip CVI Service, please see this post for a step by step guide on how to set up Pexip CVI Service
Want personalized help getting set up in your organization? We're happy to chat.
- Financial services
- Enterprise
- Government
- Retail
- Teams Rooms interop
- Connect


